Pick a level spot, pour a solid base, coat, stripe, and equip.
Curious about how to build a pickleball court that plays great and lasts? You’re in the right place. I’ve planned, built, and managed courts for homes, HOAs, and parks. In this guide, I’ll show you how to build a pickleball court from permits to paint, with clear steps, costs, and pro tips that prevent expensive mistakes.

Plan First: Zoning, Permits, and Neighbors
Before any dirt moves, check local rules. Most cities require a permit for new slabs, fencing, and lights. Some HOAs restrict color, height, and hours of play. Noise can also be a factor, so be sure you understand set-backs and sound rules.
Do this early. It sets your budget and timeline. I have seen projects sit for months because a light pole exceeded the limit by one foot. Ask questions, get the rules in writing, and keep them on site.
Key steps:
- Call your city or county about permits and inspections.
- Confirm setbacks, fence height, and lighting limits.
- Talk to neighbors. Share your plan and hours of play.
- Ask utilities to mark buried lines.
Official Dimensions and Layout That Play Right
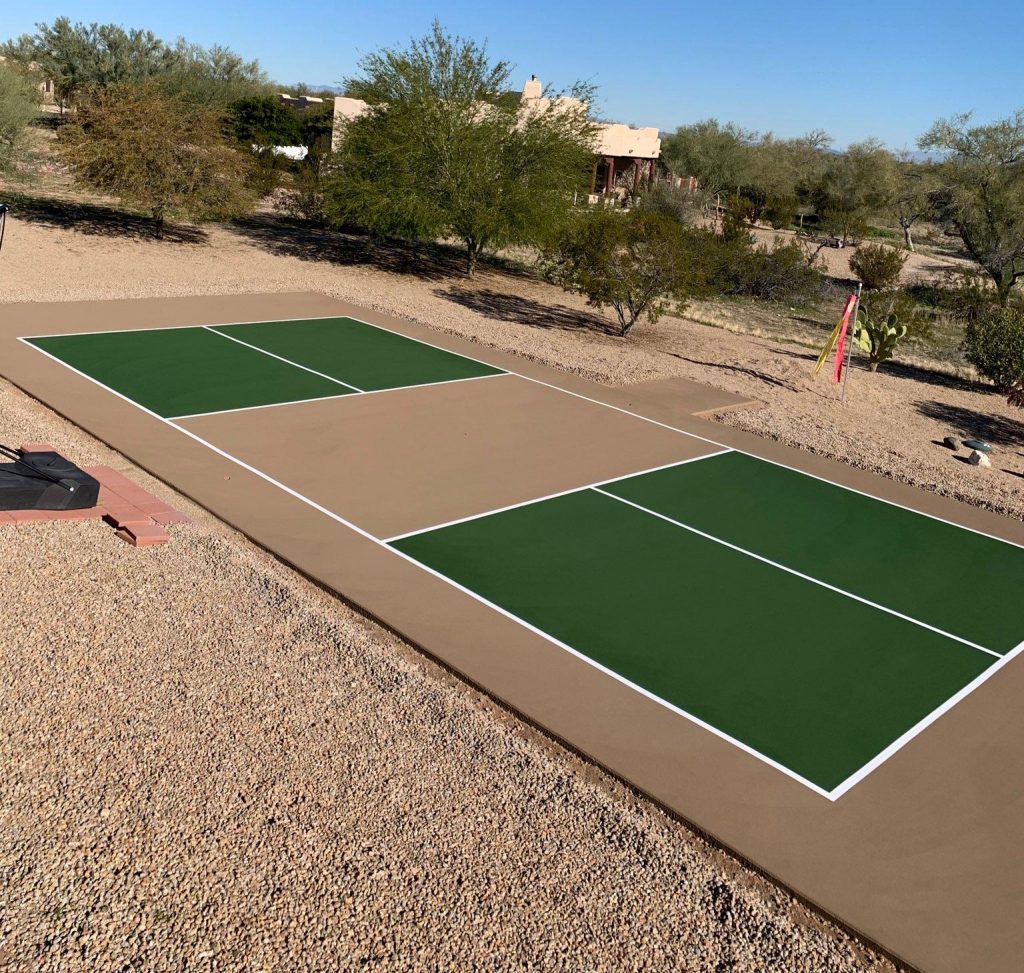
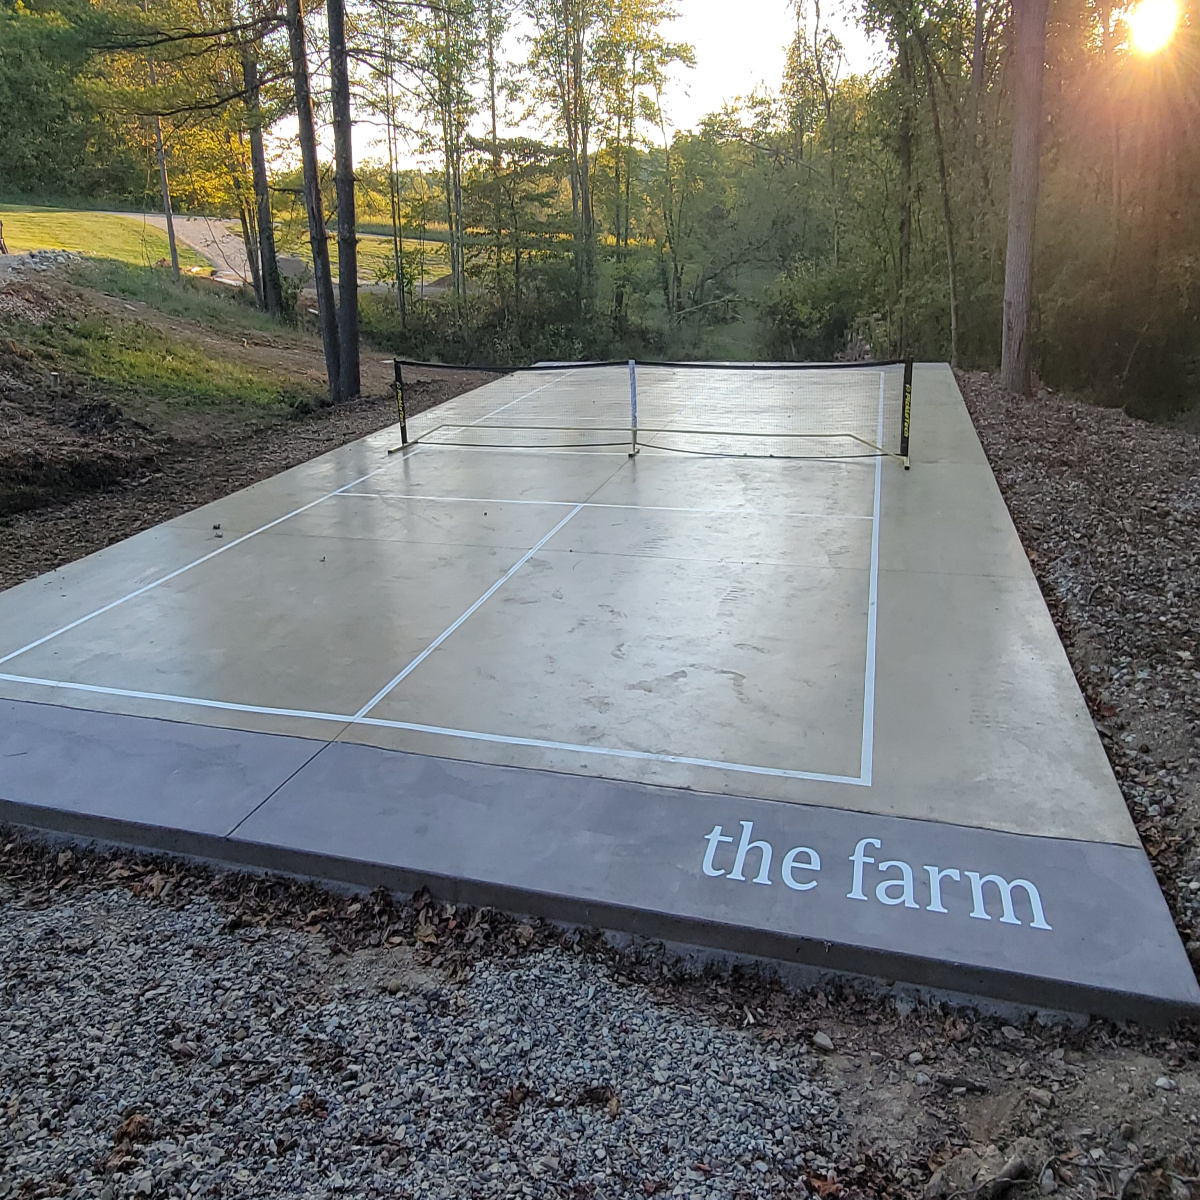
A standard pickleball court playing area is 44 feet by 20 feet. For safe run-off, plan a total area of 60 feet by 34 feet. This gives room to move, fences, and gates. The net spans 22 feet. It is 36 inches high at the posts and 34 inches at center.
Line details:
- Lines are 2 inches wide and usually white.
- The non-volley zone (the kitchen) is 7 feet from the net on both sides.
- Each service court is 10 feet by 15 feet.
Tip: Place the court with a north–south axis to reduce sun in players’ eyes. This is a small move that boosts play.

Pick the Best Site: Sun, Slope, and Space
Good sites save money. You need a flat, stable area with room for access and fencing. Avoid tree roots, soft soils, and flood-prone spots. Aim for a gentle slope of 0.5% to 1.0% for drainage away from the court.
What I look for:
- Hard, stable subgrade with no organic fill.
- Room for a 60 by 34 foot pad plus a work zone.
- No low spots after rain. Puddles are a red flag.
- Space for parking and clear delivery paths.
If you are unsure, hire a soils pro for a quick report. That small fee can prevent years of cracks.
Choose Your Base: Asphalt, Concrete, or Modular
Your base is the backbone. Get this right, and the rest is easy. For most outdoor courts, asphalt or concrete are the top picks. Modular tiles work well for temporary or low-impact builds.
Your main options:
- Asphalt. Cost effective. Two lifts totaling 2 to 3 inches over 4 to 6 inches of compacted stone. Needs curing and a quality acrylic system.
- Concrete. Very stable. A 4 to 5 inch slab with rebar or post-tension cables. Control joints must be planned so they do not ruin play.
- Modular tiles. Fast install over a flat base. Softer on joints. Great for driveways or multi-use spaces.
My take: If budget allows, post-tensioned concrete is gold. It resists cracks and keeps the bounce true. If not, a well-built asphalt base still plays great.

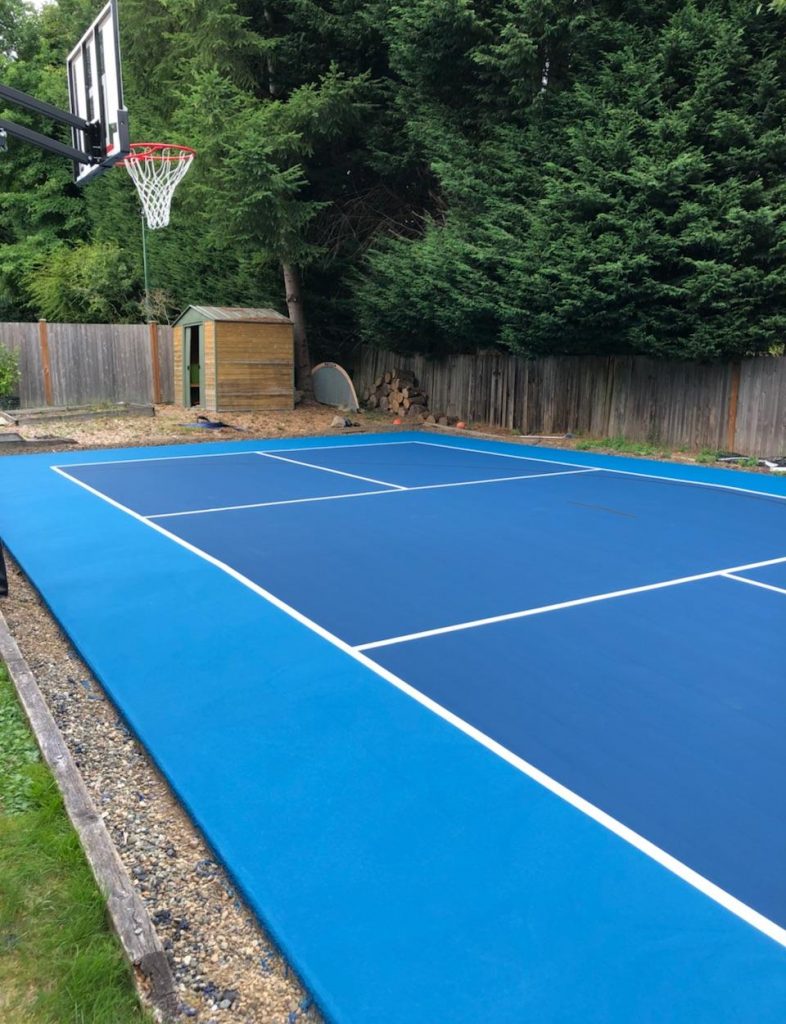
Surface Systems and Color Choices That Last
Acrylic sport coatings make the court safe and durable. The system is simple: repair, prime if needed, then 2 to 3 color coats with sand for texture. Choose mid-tone colors to cut glare and heat.
Pro tips:
- Use color for the in-bounds area and a darker or lighter shade for out-of-bounds.
- Add graded silica sand for grip without harsh abrasion.
- Let asphalt cure per manufacturer guidance before coating.
Mistake to avoid: Using cheap paint. It will chalk, fade, and peel. Use sport-grade acrylic made for courts.

Drainage and Subbase: Keep Water Away
Water is the enemy. Your subbase and slope should move water off the court fast. A simple rule is to pitch the slab 0.5% to 1.0% to one side. On flat sites, install drains along edges to capture flow.
Build it like this:
- Excavate to solid soil. Remove organics.
- Place 4 to 6 inches of compacted crushed stone. Compact in lifts.
- Use geotextile fabric if soils are weak.
- Add edge drains or a French drain if water collects nearby.
On one build, we added a shallow swale upstream. It stopped sheet flow and kept the court dry during storms.

Fencing, Windscreens, and Net Systems
A good fence keeps balls in and players safe. For a single court, 10-foot chain link is common, with one or two 4 to 5 foot gates. Add windscreens to cut gusts and noise.
Net setup:
- Posts set 22 feet apart, measured inside to inside.
- Footers in concrete below frost depth.
- Use an internal ratchet or external crank.
- Center strap to set 34 inches at mid-net.
Tip: Add padding on gate latches and post corners. It prevents snags and small injuries.
Lighting Done Right: Even, Bright, and Legal
Good lights extend play time and increase value. For one court, aim for even light at 30 to 50 foot-candles. Go with LED fixtures for low power use and long life. Pole height of 18 to 20 feet works well. Two or four poles can do the job.
What to plan:
- Evenness ratio close to 2:1 or better for comfort.
- Full-cutoff fixtures to limit glare and spill.
- Timers or smart controls to manage hours.
Always confirm local light limits. Shield fixtures if homes sit nearby.

Lines and Markings: Crisp and Accurate
Lines define the game. After the final color coat cures, snap chalk lines, then mask. Apply two thin coats of textured line paint. Remove tape while the paint is still tacky for clean edges.
Order of work:
- Baseline and sidelines.
- Non-volley zone line 7 feet from the net.
- Centerline and service lines.
- Verify net height again before first play.
Keep tape edges tight to avoid bleed. A laser line helps on long runs.
Cost and Budget: What You’ll Likely Spend
Costs vary by region, access, and site work. For a single outdoor court, expect roughly:
- Site work and drainage: 2,000 to 8,000
- Base and subbase: 8,000 to 20,000
- Acrylic surfacing: 3,000 to 7,000
- Fencing and gates: 5,000 to 12,000
- Net posts and net: 500 to 1,500
- Lighting and power: 7,000 to 20,000
- Striping, windscreens, extras: 1,000 to 4,000
Typical total range: 20,000 to 60,000 for a quality outdoor court. Post-tensioned concrete runs higher. DIY work can lower costs, but only if you have the right tools and help.
DIY vs. Hiring Pros: Make a Smart Call
You can DIY parts of the build, but the base and surfacing are high-skill. Mistakes with slope, compaction, or coating will show up fast. A hybrid plan works well: hire pros for earthwork, base, and coatings, then handle nets, windscreens, and accessories.
Good DIY targets:
- Site clearing and simple grading.
- Installing windscreens and accessories.
- Painting lines if you have a steady hand.
Hire pros for:
- Compaction and subbase.
- Asphalt or concrete placement.
- Acrylic surfacing in hot or windy climates.
Tools and Materials Checklist
Gather what you need before you start. Delays kill momentum and waste money.
Key tools:
- Laser level or transit, long straightedge, and string lines.
- Plate compactor and hand tamp.
- Concrete or asphalt tools, rollers, squeegees.
- Drill, wrenches, ratchets, and safety gear.
- Paint sprayer or rollers, line tape, and chalk.
Key materials:
- Crushed stone, geotextile, and edge drains.
- Asphalt or concrete, rebar or post-tension system.
- Acrylic coatings, silica sand, and line paint.
- Net posts, footers, net, center strap.
- Fencing, gates, windscreens, and tie-wraps.
Maintenance and Seasonal Care
Courts last longer with simple care. Sweep or blow off grit weekly. Rinse surfaces to remove dust and pollen. Spot-fix cracks early.
Seasonal tips:
- Recoat every 3 to 5 years based on wear and sun.
- Check net height and cable tension monthly.
- Lubricate ratchets and replace worn center straps.
- Remove standing water fast to avoid stains.
One HOA I worked with added a court log. It tracks cleaning, small fixes, and net checks. Problems dropped by half.
Common Mistakes to Avoid
I see the same errors over and over. You can avoid them with simple checks.
Top pitfalls:
- Building too flat. No slope means puddles.
- Skipping compaction. The base settles and cracks.
- Placing joints under key lines. It looks bad and plays worse.
- Using cheap paint. It fades and peels fast.
- Ignoring neighbors. Noise fights are costly.
Plan well, and most of these never happen.
Project Timeline and Workflow
A clean sequence keeps things smooth. Weather, inspections, and curing times drive the schedule.
Typical timeline:
- Planning and permits: 2 to 6 weeks
- Site work and subbase: 3 to 7 days
- Asphalt or concrete: 1 to 3 days
- Cure time: asphalt up to 30 days; concrete 28 days minimum
- Surfacing and lines: 3 to 6 days
- Fencing, nets, and punch list: 2 to 4 days
Build during a dry season if you can. Plan for rain days to avoid rushed work.
Safety, Access, and Community Fit
Great courts are safe and welcoming. Add a hard, flat path to the gate. Use gates wide enough for wheelchairs and dollies. Keep clear zones around the court.
Easy wins:
- Gate width of at least 4 to 5 feet.
- Non-slip surfaces near entries.
- Benches and a water station outside play zones.
- Signage for rules and hours of use.
If sound is a concern, use softer paddles, windscreens, and landscape buffers.
Build Greener: Smart Materials and Power
You can reduce impact without hurting play. Choose low-VOC coatings. Use cool color blends to cut heat. Install LED lights with timers and shields. Where possible, route stormwater into landscape beds.
Green ideas:
- Reuse existing slabs with modular tiles.
- Solar power for lights or chargers.
- Native plants for buffers and sound control.
These upgrades save money over time and keep neighbors happy.
Step-by-Step: How to Build a Pickleball Court
Here is a simple path you can follow. This shows how to build a pickleball court from bare ground to first serve.
- Confirm zoning, permits, and utilities.
- Pick a north–south layout and mark 60 by 34 feet.
- Excavate organic soil and proof-roll the subgrade.
- Install geotextile if needed, then 4 to 6 inches of crushed stone. Compact each lift.
- Set forms with 0.5% to 1.0% slope. Check with a laser.
- Place asphalt in two lifts or a 4 to 5 inch concrete slab. Cure per spec.
- Install fence posts and net footers at 22 feet apart.
- Repair hairline flaws. Fill low spots. Clean the surface.
- Apply acrylic color coats with sand. Let each coat dry.
- Snap lines, mask, and paint all markings.
- Set posts, hang the net, and adjust to 36 inches at posts and 34 inches at center.
- Add windscreens, benches, and signage. Walk the site and fix small issues.
That is how to build a pickleball court that plays fair and looks sharp.
Budget Scenarios for Different Builds
Budgets change with goals. Here are three common paths.
- Starter DIY on a flat site. Use modular tiles over a sound slab. Add a mid-grade net and basic fence. Budget: 8,000 to 20,000.
- Standard asphalt with acrylic surfacing. Full fence, windscreens, and quality net. Budget: 25,000 to 45,000.
- Premium post-tensioned concrete. Pro surfacing, lights, and extras. Budget: 45,000 to 80,000.
Map your must-haves first. Lights and fencing drive costs more than most expect.
My Hard-Learned Lessons from the Field
I’ve made mistakes so you do not have to. On one job, we trusted an old slab that looked flat. After the first rain, water sat near the kitchen line. We had to grind and patch. Now I always flood-test before coating.
Lessons to keep:
- Test slopes with water, not just a level.
- Over-compact edges. That is where cracking starts.
- Mask lines with fresh tape only. Old tape leaks.
- Talk to neighbors from day one. Invite them to play.
These small habits save time, money, and stress.
SEO Quick Tips: Make Your Court Findable if You’re a Club
If you are building for a club or rental, set yourself up online. People search for how to build a pickleball court, but they also search where to play.
Simple wins:
- Post hours, photos, and directions on maps.
- Add lighting and surface details to your listing.
- Share booking links and league info on one page.
- Use clean, bright photos of the actual court.
Players judge by what they see. Show your best angles.
Frequently Asked Questions of how to build a pickleball court
What are the exact dimensions for a pickleball court?
The playing area is 20 by 44 feet. Plan for a total build area of 60 by 34 feet to allow safe run-off and fencing.
How long does it take to build one court?
Most builds take 3 to 8 weeks, including permits and curing. Weather, inspections, and lighting can extend the timeline.
Is asphalt or concrete better for a pickleball court?
Both work well when built right. Post-tensioned concrete resists cracking best, while asphalt costs less and still plays great with a quality coating.
How much does a pickleball court cost?
Expect 20,000 to 60,000 for a complete outdoor court, with lighting and premium options adding more. Site work and access impact the total the most.
What kind of paint is used for the surface and lines?
Use acrylic sport coatings with silica sand for texture and sport-grade line paint. Avoid standard exterior paint, as it will wear and peel fast.
How high should the fence be?
A 10-foot fence around most sides is common for outdoor courts. Use at least one 4 to 5 foot gate for access and safety.
What is the correct net height?
The net is 36 inches high at the posts and 34 inches at the center. Use a center strap for accuracy.
Wrap-Up and Next Steps
You now know how to build a pickleball court from planning to play. Pick a good site, get the slope right, choose a stable base, and use a quality acrylic system. Add proper fencing, lighting, and clear lines, and you will have a court that plays true for years.
If you are ready, start with permits and a simple site plan this week. Have questions about how to build a pickleball court for your yard, school, or HOA? Drop a comment, subscribe for more guides, or reach out for a checklist you can use on day one.